Install Nagios 4.0.4 on Centos 7

For RHEL/CentOS users:

#yum install -y wget httpd php gcc glibc glibc-common gd gd-devel make net-snmp
#yum install   httpd php  gd gd-devel gcc glibc glibc-common openssl perl perl-devel makesasa

Download Nagios Core and Nagios Plugins Tarballs
For all systems, run the following commands in your terminal:

cd /tmp
#wget http://prdownloads.sourceforge.net/sourceforge/nagios/nagios-4.0.4.tar.gz
#wget http://nagios-plugins.org/download/nagios-plugins-2.0.tar.gz

This will download Nagios Core, and it’s required plugins.
Adding the Nagios User and Group
Next add the appropriate user and group for the Nagios process to run:

#useradd nagios
#groupadd nagcmd
#usermod -a -G nagcmd nagios

Nagios Core Installatiom

#tar zxvf nagios-4.0.4.tar.gz
#tar zxvf nagios-plugins-2.0.tar.gz

Change to the new Nagios directory and install the packages:

#cd nagios-4.0.4
#./configure --with-command-group=nagcmd
#make all
#make install
#make install-init
#make install-config
#make install-commandmode
#make install-webconf
#cp -R contrib/eventhandlers/ /usr/local/nagios/libexec/
#chown -R nagios:nagios /usr/local/nagios/libexec/eventhandlers
#/usr/local/nagios/bin/nagios -v /usr/local/nagios/etc/nagios.cfg
#/etc/init.d/nagios start

For RHEL/CentOS users:

#/etc/init.d/httpd start
#systemctl start httpd

Create a Default User for Web Access.
Add a default user for Web Interface Access:

#htpasswd -c /usr/local/nagios/etc/htpasswd.users nagiosadmin

Nagios Plugin Installation

#cd /tmp/nagios-plugins-2.0
#./configure --with-nagios-user=nagios --with-nagios-group=nagios
#make
#make install

Nagios Service Setup
The following commands will register the Nagios daemon to be run upon system startup.

chkconfig --add nagios
chkconfig --level 35 nagios on
chkconfig --add httpd
chkconfig --level 35 httpd on

Nagios Web Interface
After correctly following the procedures you should now
be able to access your Nagios Core installation from a
web browser.
Simply use the following:
http://<your.nagios.server.ip>/nagios
And log in with the credentials you chose when adding
the nagiosadmin user to the htpasswd.users file.
Finishing

Continue Reading

Como instalar Splunk 6.3.2 no CentOS Minimal 7.0

Olá amigos, segue um guia de como realizar a instação do Splunk

Efetuar o dowload do pacote de instalação.

#yum update      
#yum install wgetInstalação do Wget

dowloadsplunk

#wget http://download.splunk.com/products/splunk/releases/6.3.2/splunk/linux/splunk-6.3.2-aaff59bb082c.i386.rpm

dowload

Realizar a instalação do pacote .rpm.

#rpm -Uvh “pacote””splunk-6.3.2-aaff59bb082c.i386.rpm”

splunkinstalado

Instalando componentes

#yum -y install glibc.i686

Liberando portas no Firewall

Liberar porta web  tcp 8000, syslog na udp 5514
#firewall-cmd –zone=public –permanent –add-port=8000/tcp
#firewall-cmd –zone=public –permanent –add-port=5514/udp

Forward syslog input to high port for non-root, allow port 80 for http

#firewall-cmd –direct –permanent –add-rule ipv4 nat PREROUTING 0 -p udp -m udp \–dport 514 -j REDIRECT –to-ports 5514
#firewall-cmd –direct –permanent –add-rule ipv4 nat PREROUTING 0 -p tcp -m tcp \–dport 80 -j REDIRECT –to-ports 8000

Reiniciar o firewall
#firewall-cmd –reload

Acessar o Diretorio de inicialização dentro do Splunk /opt/splunk/bin
#./splunk start –accept-license  “Iniciar o Splunk e aceitar todos os termos”
#./splunk enable boot-start        ” Colocar o Splunk na inicialização”.

O Splunk pode ser acessado através da URL http://ipserver:8000/

Splunk

Continue Reading

Como configurar endereço de IP estático no CentOs.

Olá pessoal. 

Muitas pessoas tem duvida de como configurar endereço de IP estático no CentOs

Segue os passos:

1- Abir o diretorio /etc/sysconfig/network-scripts/

Dentro desta pasta estará o arquivo de rede “ifcfg-eno***”

network

Abra o arquivo, note que a configuração estará da seguinte forma:

TYPE=Ethernet
BOOTPROTO=dhcp
DEFROUTE=yes
PEERDNS=yes
PEERROUTES=yes
IPV4_FAILURE_FATAL=no
IPV6INIT=yes
IPV6_AUTOCONF=yes
IPV6_DEFROUTE=yes
IPV6_PEERDNS=yes
IPV6_PEERROUTES=yes
IPV6_FAILURE_FATAL=no
NAME=eno16777736
UUID=4987f78e-9627-4bca-8a54-e0412ff7d3f6
DEVICE=eno16777736
ONBOOT=no

Comentário :

BOOTPROTO=dhcp # O Ip sera pego via DHCP

ONBOOT=no # O adaptador de rede fica desativado


Segue a forma correta do arquivo: 

TYPE=Ethernet
BOOTPROTO=static   # Configuração de IP estática.
DEFROUTE=yes
PEERDNS=yes
PEERROUTES=yes
IPV4_FAILURE_FATAL=no
IPV6INIT=yes
IPV6_AUTOCONF=yes
IPV6_DEFROUTE=yes
IPV6_PEERDNS=yes
IPV6_PEERROUTES=yes
IPV6_FAILURE_FATAL=no
NAME=eno16777736
UUID=4987f78e-9627-4bca-8a54-e0412ff7d3f6
DEVICE=eno16777736
ONBOOT=yes             #  Adpatador rede ficar ativado
IPADDR=10.1.1.119  # Endereço de Ip
NETMASK=255.0.0.0 # Mascara de Rede
GATEWAY=10.1.1.1  # Gateway da Rede
DNS1=10.1.1.1           # DNS Principal
DNS2=8.8.8.8             # DNS Secundario

Pronto, apos o boot a configuração estará salva e funcionando.

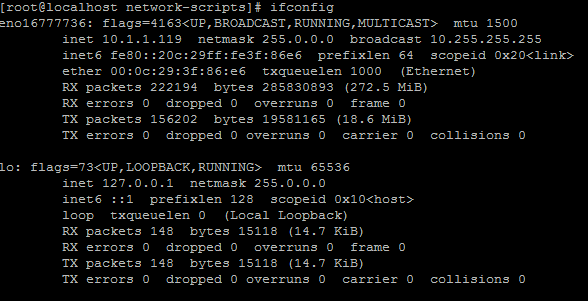
Apos isso a configuração pode ser validada dando o seguinte comando:

Para que este comando funcione deve ser instalado o servido NETSTAT.

#yum install net-tools

# ifconfig

NETSTAT

Configurado!

Continue Reading

Instalar Owncloud-8.2.2-1 no Centos 7

Instalar atualizações
#yum update
#yum install wget
#yum install vim

Instar owncloud-8.2.2-1 para CentOS_7

Execute os seguintes comandos como root para confiar no repositório.

#rpm –import https://download.owncloud.org/download/repositories/stable/CentOS_7/repodata/repomd.xml.key

Execute os seguintes comandos como root para adicionar o repositório e instalar a aplicação.

#rpm -Uhv http://dl.fedoraproject.org/pub/epel/7/$(uname -i)/e/epel-release-7-5.noarch.rpm
#wget http://download.owncloud.org/download/repositories/stable/CentOS_7/ce:stable.repo -O #/etc/yum.repos.d/ce:stable.repo
#yum clean expire-cache
#yum install owncloud

Ajustando Firewall’s e Portas
#firewall-cmd –permanent –add-service=http
#firewall-cmd –permanent –add-service=https
#firewall-cmd –reload

Ajustando parametros da pagina Owncloud

#semanage fcontext -a -t httpd_sys_rw_content_t ‘/var/www/html/owncloud/data’
#restorecon ‘/var/www/html/owncloud/data’
#semanage fcontext -a -t httpd_sys_rw_content_t ‘/var/www/html/owncloud/config’
#restorecon ‘/var/www/html/owncloud/config’
#semanage fcontext -a -t httpd_sys_rw_content_t ‘/var/www/html/owncloud/apps’
#restorecon ‘/var/www/html/owncloud/apps’

Ajustando tamanho de Upload

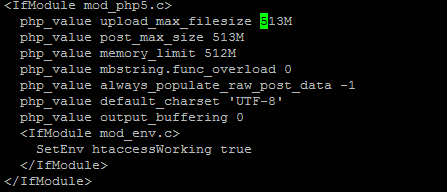
Abrir o arquivo : vim /var/www/html/owncloud/.htaccess

Vai estar desta forma:

aumentar tamanho
php_value upload_max_filesize 513M
php_value post_max_size 513M
php_value memory_limit 512M

Você pode selecionar o tamanho que achar ideal, no meu caso configurei da seguinte forma:

php_value upload_max_filesize 16G
php_value post_max_size 16G
php_value memory_limit 2G

ownclod

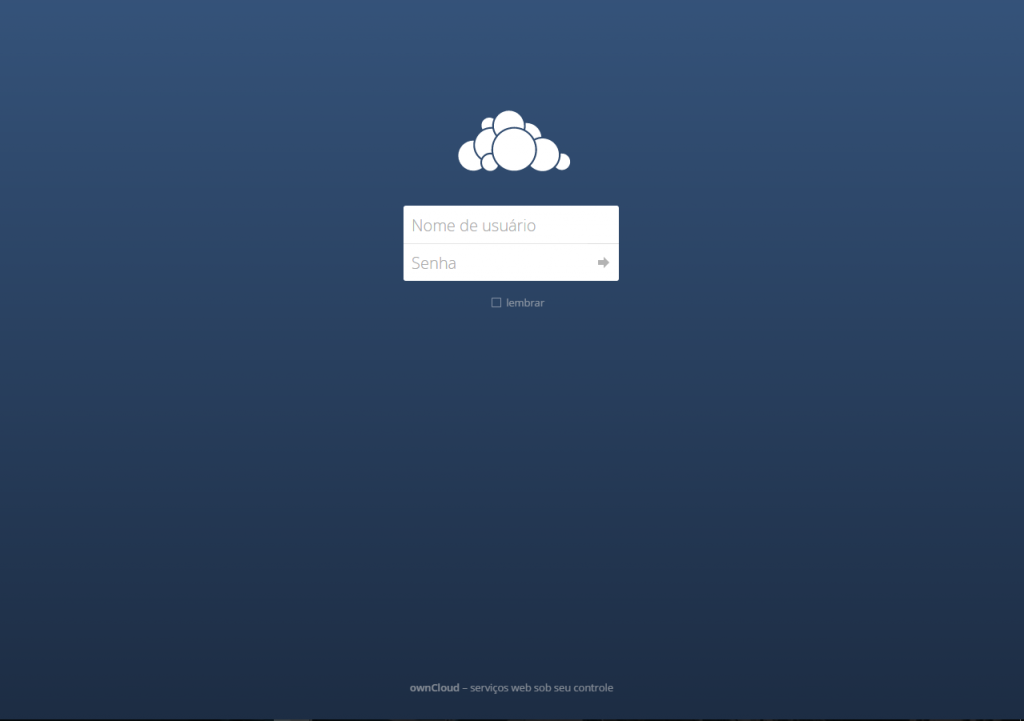
Pronto configurado o Owncloud, somente utilizar.

Continue Reading