Introduction
Bacula is an open source network backup solution that allows you create backups and perform data recovery of your computer systems. It is very flexible and robust, which makes it, while slightly cumbersome to configure, suitable for backups in many situations. A backup system is an important component in most server infrastructures, as recovering from data loss is often a critical part of disaster recovery plans.
Getting Started
The first thing to do after the installation is complete is update the CentOS using:
yum update
This goes through the update which takes a couple of minutes depending on how fast the network is. You may be prompted to enter a “Y” at various stages of this process.
Installing Nano Text Editor
The next thing to do is install nano text editor so I can easily edit files. I find it much easier to use than vi so I prefer using nano. To install this, I use:
yum -y install nano
Installing wget
Install wget because you will need it later in the installation process.
yum -y install wget
Installing Webmin on CentOS 7
After nano is installed, you need to create a new file called webmin.repo and save it in /etc/yum.repos.d/. To do this, you can type:
nano /etc/yum.repos.d/webmin.repo
This opens a blank file where you can type in (or copy and paste):
[Webmin]
name=Webmin Distribution Neutral
#baseurl=http://download.webmin.com/download/yum
mirrorlist=http://download.webmin.com/download/yum/mirrorlist
enabled=1
Once it’s pasted (by right clicking), hit Control+X and then Y then Enter to save the file.
Now, install Webmin GPG key using this command:
rpm --import http://www.webmin.com/jcameron-key.asc
Now lets check for any updates by typing:
yum check-update
Now it’s time to install Webmin and we do that by typing in:
yum -y install webmin
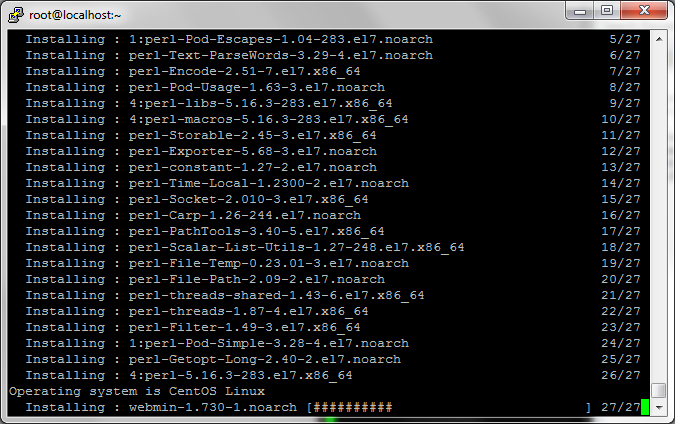
After a short period of time, Webmin will be installed and it’s time to set it to start automatically by typing the following lines:
chkconfig webmin on
service webmin start
Webmin is now installed and running but we need to allow port 10000 through the firewall so we can access it from another computer. In order to do this, type the following command:
firewall-cmd --add-port=10000/tcp
If you want to make this rule permanent, you can also type in this which will add it to the rules:
firewall-cmd --permanent --add-port=10000/tcp
If you plan on running Webmin on a different port, you can skip adding 10000 as a permanent rule and set it later with the port of your choice.
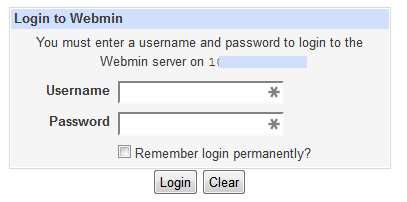
Now you should be able to access Webmin using the IP address you used to set up the server when you installed it by going to the browser and typing:
http://192.168.1.2:10000 (where 192.168.1.2 is the IP of your server)
Installing Bacula 7 on CentOS 7
Now that I have Webmin installed and running, it’s time to install Bacula.
The first thing that you need to do is install epel. To do this, go find the latest release for CentOS 7 and right click on it to copy the link:
http://www.rpmfind.net/linux/rpm2html/search.php?query=epel-release
Once you have the link copied, type in wget and paste the link… it should look like
wget ftp://195.220.108.108/linux/centos/7.0.1406/extras/x86_64/Packages/epel-release-7-5.noarch.rpm
This will download the RPM and now you will need to install it by typing in the following:
yum -y install epel-release-7-5.noarch.rpm
NOTE: the latest version may be different than shown above so be sure to change it if that is the case.
After the installation of the EPEL, Go ahead and do another update by typing in:
yum update
Now we need to create a file in the /etc/yum.repos.d/ directory like we did with Webmin above. To to that, we will use nano again and type in the following:
nano /etc/yum.repos.d/epel-bacula7.repo
Now you will need to copy and paste the following into the file we just created:
[epel-bacula7]
name=Bacula backports from rawhide
baseurl=http://repos.fedorapeople.org/repos/slaanesh/bacula7/epel-$releasever/$basearch/
enabled=1
skip_if_unavailable=1
gpgkey=http://repos.fedorapeople.org/repos/slaanesh/bacula7/RPM-GPG-KEY-slaanesh
gpgcheck=1
[epel-bacula7-source]
name=Bacula backports from rawhide - Source
baseurl=http://repos.fedorapeople.org/repos/slaanesh/bacula7/epel-$releasever/SRPMS
enabled=0
skip_if_unavailable=1
gpgkey=http://repos.fedorapeople.org/repos/slaanesh/bacula7/RPM-GPG-KEY-slaanesh
gpgcheck=1
Now hit Control + X to exit and hit Y and then Enter to save the new file.
Once you have saved the file, verify that Bacula 7 shows up on the list by typing the following and hitting enter:
yum list bacula*
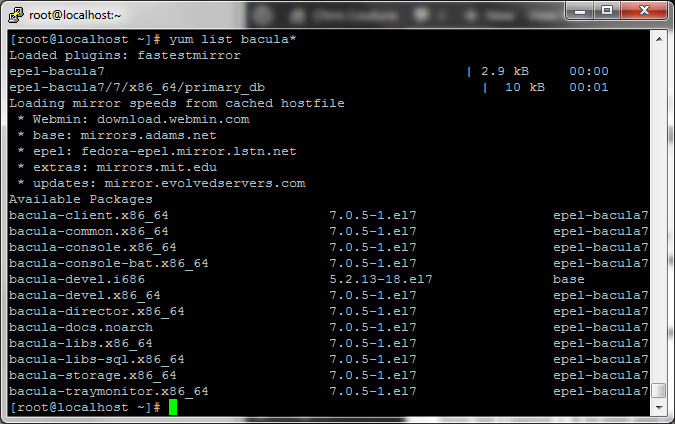
If you don’t see Bacula 7, verify that you did the steps above correctly.
Now we are ready to Install MariaDB and Bacula
Next you will install MariaDB and all of the Bacula files. To do that, type in the following:
yum -y install mariadb mariadb-server bacula-director-mysql bacula-console
yum -y install bacula-client bacula-storage-mysql mysql-server mysql-devel
Once everything installs (takes about a minute or two), you will need to start the MariaDB database server by typing in:
systemctl start mariadb.service
chkconfig mariadb on
Next you need to run through the secure installation process for MariaDB which will allow you to set the root password, remove test users etc. The prompts are easy to follow and everything should be Yes.
mysql_secure_installation
The default root password is blank to just hit enter and set a new root password. This isn’t the password you will use for Bacula, it’s the root mysql password.
After you have completed this step, you will want to go to Webmin which you installed earlier so you can set up the database and a Bacula user for the database.
If you look under Servers, you will probably not see MySql Database Server because you just installed it. You will need to go to Refresh Modules at the bottom of the menu and click it. Now you should see MySql Database Server in the list. Click it and you will be asked to enter the username and password for the database. This will be root and the password you just entered when setting up the database.
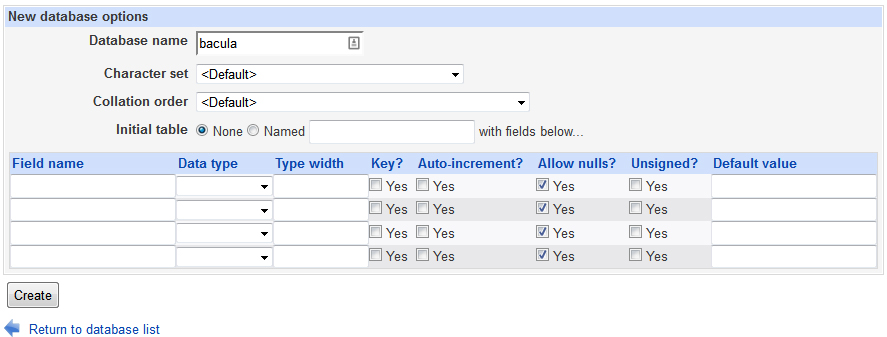
Now you will need to add a bacula database so click Create a New Database.
Type in bacula as your database name for your bacula database and leave the rest of the fields default. Note, the name must be bacula!
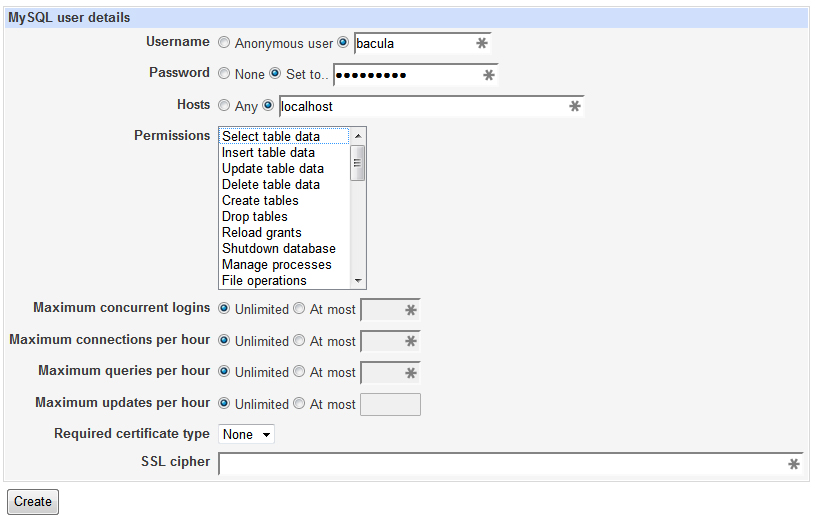
Now you will need to create a bacula user for your database. To do this, go to User Permissions and Add User to add the user. Be sure to set the Hosts to localhost and don’t worry about setting permissions. Click Create.
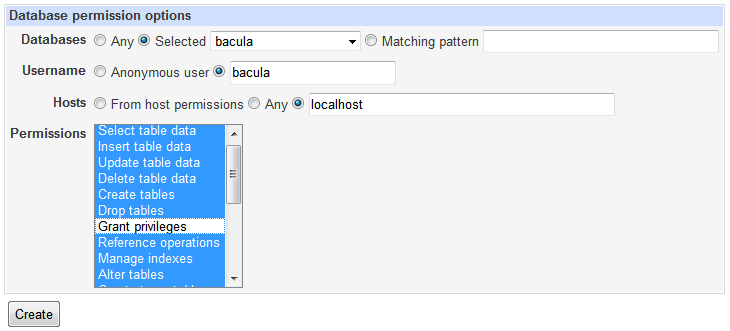
Now you will click on Database Permissions and add all permissions except Grant for the user you created to the bacula database. Once again, be sure to have the hosts set as localhost.
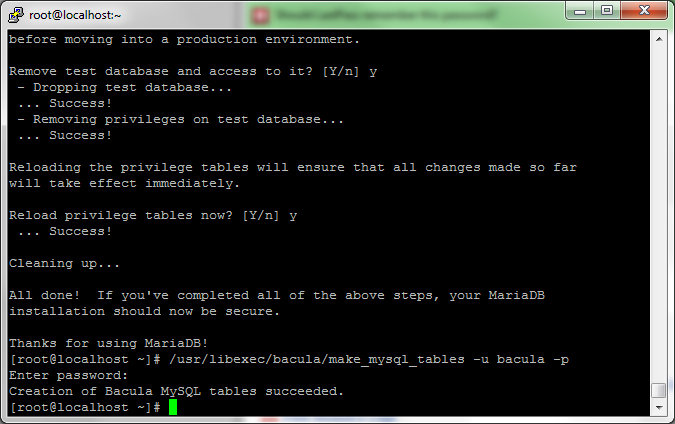
Now that your database is created and the user is setup, you will need to create the tables. You can do this by going back to your SSH terminal and typing (note: add the username you created):
/usr/libexec/bacula/make_mysql_tables -u usernameyoucreated -p
Enter the password you used for the user.
Now we need to tell Bacula to use Mysql as the libary. To do this, lets first stop the services by typing in:
systemctl stop bacula-dir
systemctl stop bacula-fd
systemctl stop bacula-sd
Now lets set Bacula to use the Mysql library:
su -c 'alternatives --config libbaccats.so'
This should show you the following:
There are 3 programs which provide ‘libbaccats.so’.
Selection    Command
———————————————–
1           /usr/lib64/libbaccats-mysql.so
2           /usr/lib64/libbaccats-sqlite3.so
*+  3           /usr/lib64/libbaccats-postgresql.so

Hit 1 and press enter to select MySql.
Now lets start the services back by using the following commands:
systemctl start bacula-dir

systemctl start bacula-fd

systemctl start bacula-sd
Now you should be able to go to Webmin and look under System and you will need to click on Bacula Backup System. Don’t worry if it gives you an error. This is because you haven’t set up the config yet. You will need click on Module Configuration and set it up to use MySql and enter the login information you created previously for your Bacula user.
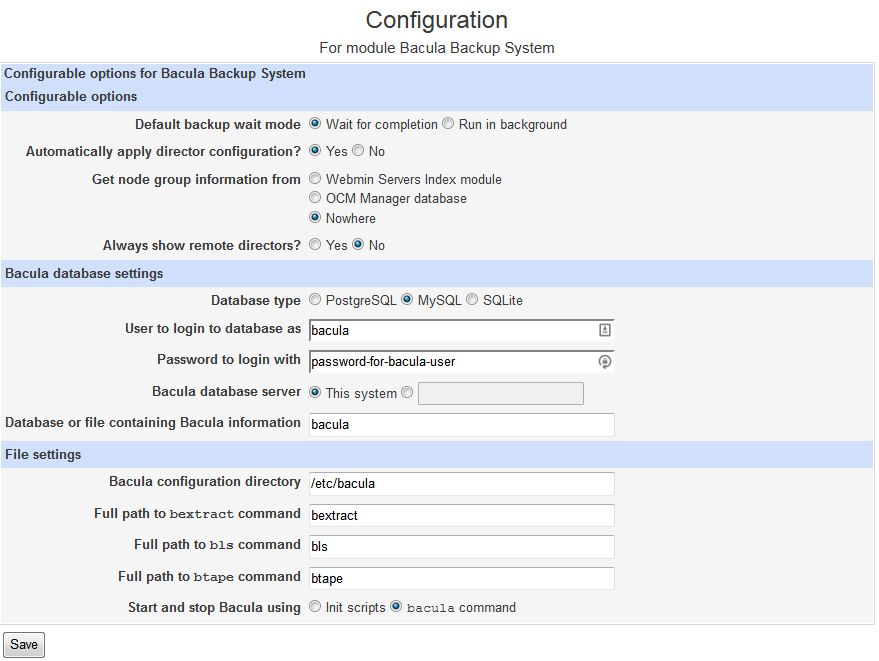
Click Save and you should be able to access the Bacula page where you can set up your Bacula System.
Getting Everything Working
Now that you have that part working, you still can not start any of the daemons yet since they are not set up. You will have to go into each file and modify them so that they will communicate with each other.
If you try to start Bacula, you may receive the following message:
The Bacula console command /sbin/bconsole could not communicate with the Bacula director. Make sure the password in /etc/bacula/bconsole.conf is correct.
You can either use the File Manager within Webmin or connect to your server using sftp and look in the /etc/bacula directory and you will find the following files you need to edit. I just drag them back to my desktop and edit them in a text editor.
bacula-dir.conf
bacula-fd.conf
bacula-sd.conf
bconsole.conf
There are a lot of passwords and IP addresses that need to be changed in there files so pay attention to and @@PASSWORD@@ areas and change them accordingly.
Be sure to catch the bottom of the bacula-dir.conf file and change the catalog database password to the one you assigned when you created the database user.
Also, look for localhost and change this to your local IP address on your backup server. You don’t need to do this on the clients since you will be setting those up later on. In fact, you can delete most of the test clients that are in the default if you wish. I will post a guide on setting up all the configuration files later on.
Firewall Ports
In order to allow clients and consoles to talk to your Bacula server, you need to open ports 9101, 9102 and 9103. The following command in your SSH console with open these ports.
firewall-cmd --add-port=9101/tcp
firewall-cmd  --permanent --add-port=9101/tcp
firewall-cmd --add-port=9102/tcp
firewall-cmd  --permanent --add-port=9102/tcp
firewall-cmd --add-port=9103/tcp
firewall-cmd  --permanent --add-port=9103/tcp
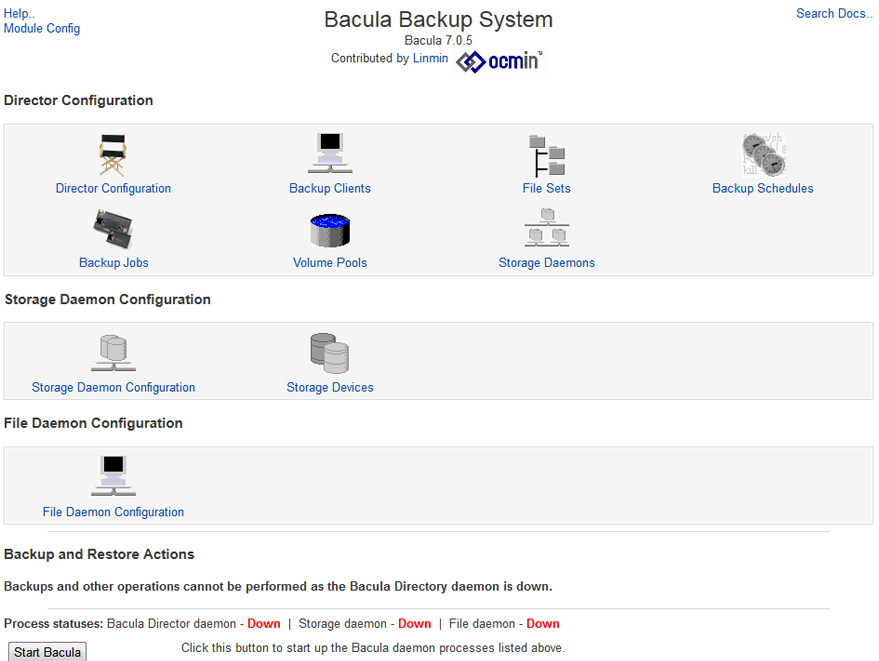
Now you should be able to start Bacula and see all of the Daemons are showing UP.
Installing Bacula-Web
Bacula-Web uses Apache to serve up the pages so you will need to install Apache and get it running using the following:
yum -y install httpd
chkconfig httpd on
service httpd start
Configure Apache to start at boot:
systemctl start httpd.service
systemctl enable httpd.service
Next you need to add MySql support to Apache by entering the following:
yum -y install php php-gd php-gettext php-mysql php-pdo
Install other common modules needed…
yum -y install php-gd php-ldap php-odbc php-pear php-xml php-xmlrpc php-mbstring php-snmp php-soap curl curl-devel
In order for Apache to get past the firewall, you will need to open the ports by using the following:
firewall-cmd --permanent --zone=public --add-service=http
firewall-cmd --permanent --zone=public --add-service=https
firewall-cmd --reload
Now you need to get the web files. Go to the Bacula-Web website and download the latest version.
http://www.bacula-web.org/download.html
Save and unpack the archive to your desktop or another location. We will need to modify the config file before uploading to the server.
Open the Application/Config directory and rename config.php.sample to config.php and then open it in a text editor.
Look for the MySql area and change the settings to match your server. Be sure to uncomment the config settings be removing the “//” in front of the $config settings. You probably just need to edit the password at this point.
//MySQL bacula catalog
$config[0]['label'] = 'Backup Server';
$config[0]['host'] = 'localhost';
$config[0]['login'] = 'bacula';
$config[0]['password'] = 'verystrongpassword';
$config[0]['db_name'] = 'bacula';
$config[0]['db_type'] = 'mysql';
$config[0]['db_port'] = '3306';
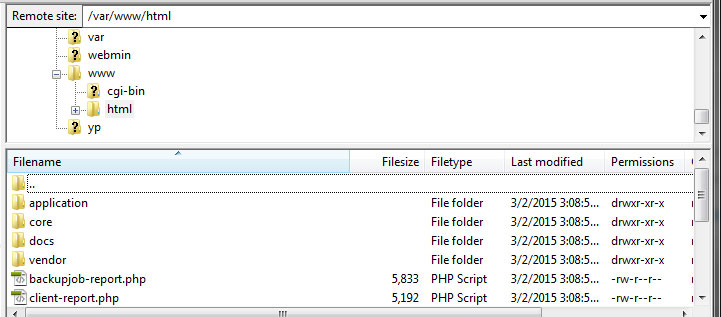
After you have saved the config file, you need to upload the files to your server under the /var/www/ directory. You can SFTP to your server using FileZilla and the IP of your server. If this server is only serving as a backup server, you can upload the files into the root HTML directory, otherwise you can put the files in whatever directory you wish. Go ahead and upload the files now.
Now you will need to modify the php.ini file so it has the correct time zone for your system. Since you already have the FTP up, browse to /etc/php.ini and copy if over to your desktop and them open it in a text editor. Do a search for “date.timezone” which should be around line 878. You can find the different time zones available by going to: http://php.net/date.timezone
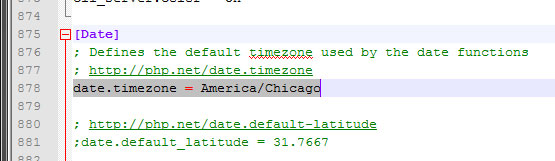
Make the change and save the file then re-upload it to the server.
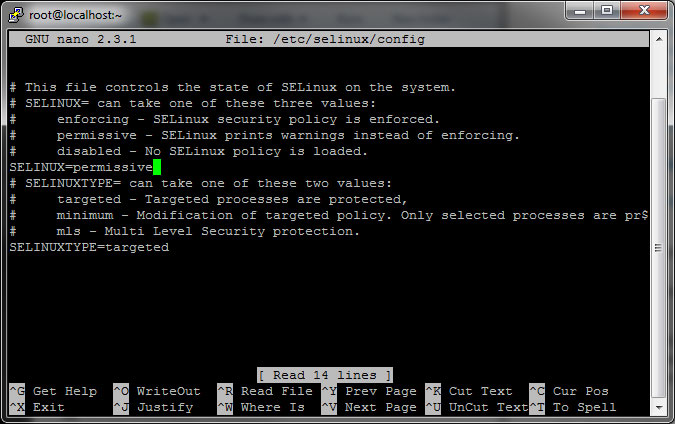
Now you need to go into SELINUX and change the settings to PERMISSIVE. In order to do this, exit the config file for SELINUX:
nano /etc/selinux/config
Change if from enforcing to permissive and hit Control + X then Y then Enter to exit and save.
Type reboot
After the system comes back online, you should be able to use your IP address to access Bacula-Web!
![]()
YOU’RE DONE!