Cacti is a complete network graphing solution designed to harness the power of RRDTool’s data storage and graphing functionality. Cacti provides a fast poller, advanced graph templating, multiple data acquisition methods, and user management features out of the box. All of this is wrapped in an intuitive, easy to use interface that makes sense for LAN-sized installations up to complex networks with hundreds of devices.
Features Graphs
Unlimited number of graph items can be defined for each graph optionally utilizing CDEFs or data sources from within cacti.
Automatic grouping of GPRINT graph items to AREA, STACK, and LINE[1-3] to allow for quick re-sequencing of graph items.
Auto-Padding support to make sure graph legend text lines up.
Graph data can be manipulated using the CDEF math functions built into RRDTool. These CDEF functions can be defined in cacti and can be used globally on each graph.
Support for all of RRDTool’s graph item types including AREA, STACK, LINE[1-3], GPRINT, COMMENT, VRULE, and HRULE.
Data Sources
Data sources can be created that utilize RRDTool’s “create” and “update” functions. Each data source can be used to gather local or remote data and placed on a graph.
Supports RRD files with more than one data source and can use an RRD file stored anywhere on the local file system.
Round robin archive (RRA) settings can be customized giving the user the ability to gather data on non-standard timespans while store varying amounts of data.
Data Gathering
Contains a “data input” mechanism which allows users to define custom scripts that can be used to gather data. Each script can contain arguments that must be entered for each data source created using the script (such as an IP address).
Built in SNMP support that can use php-snmp, ucd-snmp, or net-snmp.
Ability to retrieve data using SNMP or a script with an index. An example of this would be populating a list with IP interfaces or mounted partitions on a server. Integration with graph templates can be defined to enable one click graph creation for hosts.
A PHP-based poller is provided to execute scripts, retrieve SNMP data, and update your RRD files.
Templates
Graph templates enable common graphs to be grouped together by templating. Every field for a normal graph can be templated or specified on a per-graph basis.
Data source templates enable common data source types to be grouped together by templating. Every field for a normal data source can be templated or specified on a per-data source basis.
Host templates are a group of graph and data source templates that allow you to define common host types. Upon the creation of a host, it will automatically take on the properties of its template.
Graph Display
The tree view allows users to create “graph hierarchies” and place graphs on the tree. This is an easy way to manage/organize a large number of graphs.
The list view lists the title of each graph in one large list which links the user to the actual graph.
The preview view displays all of the graphs in one large list format. This is similar to the default view for the 14all cgi script for RRDTool/MRTG.
User Management
User based management allows administrators to create users and assign different levels of permissions to the cacti interface.
Permissions can be specified per-graph for each user, making cacti suitable for co location situations.
Each user can keep their own graph settings for varying viewing preferences.
Preparing your system
Before installing cacti you need to make sure you have installed Ubuntu 15.04 LAMP server.
Install Cacti on ubuntu 15.04 / 15.10 server
Open the terminal and run the following command
sudo apt-get install cacti-spine
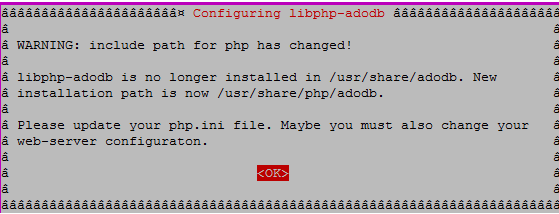
The above command starts the cacti installation and you should see the first as php path change select ok and press enter
Now select the webserver you want to use (in my case it is apache2)

Cacti database configurations select yes

Enter database admin user password

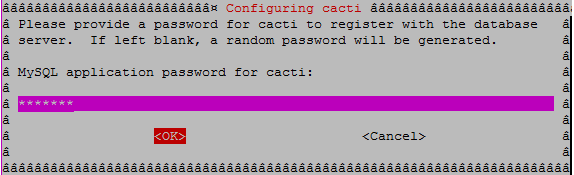
Mysql application password for cacti
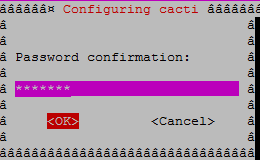
confirm the password
Now that Cacti is installed, we can start the configuration process on it.
Configuring cacti
Point your web browser towards http://YOURSERVERIP/cacti/install/ to start the initial setup and click next

Select new install option and click next
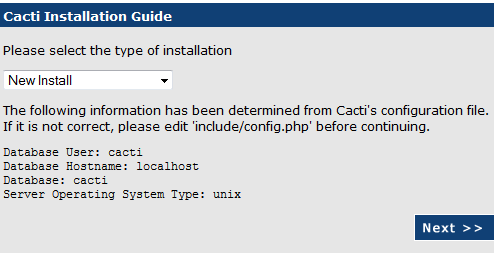
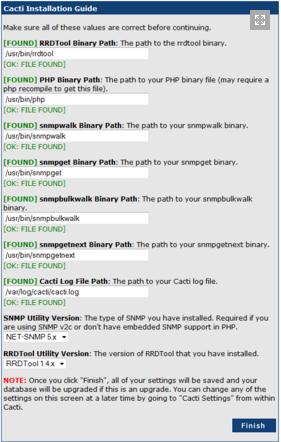
In the following screen you need to make sure you have all the required paths are correct and click on finish
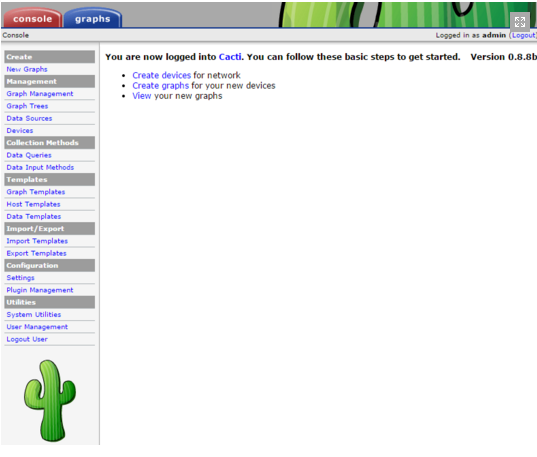
Now login to Cacti with the default admin/admin, and change the password to something more sensible

After login in to Cacti you should see similar to the following screen
That is all!