Samba is a client/server system that implements network resource sharing for Linux and other UNIX computers. With Samba, UNIX files and printers can be shared with Windows clients and vice versa. Samba supports the Session Message Block (SMB) protocol. Nearly all Windows computers include SMB support with their internal network subsystems (NetBIOS in particular).
With an appropriately-configured Samba server on Linux, Windows clients can map drives to the Linux filesystems. Likewise, theSamba client on UNIX can connect to Windows shares by their UNC name. Although differences among various operating systems (such as filesystem naming conventions, end-of-line conventions, and authentication) can limit interoperability, Samba offers a generally serviceable mechanism for resource sharing on a heterogenous network.
In this tutorial we will show you how to install and configure Samba server on RHEL and CentOS 7 linux.
Install and configure Samba on Rhel/CentOS 7
To install samba packages enter following command:
#yum install samba samba-client samba-common -y
Now configure samba edit the file /etc/samba/smb.conf
#mv /etc/samba/smb.conf /etc/samba/smb.conf.bkp
#vi /etc/samba/smb.conf
and paste following line:
[global]
workgroup = WORKGROUP
server string = Samba Server %v
netbios name = centos
security = user
map to guest = bad user
dns proxy = no
#============================ Share Definitions ==============================
[Anonymous]
path = /samba/anonymous
browsable =yes
writable = yes
guest ok = yes
read only = no
Save the smb.conf file and restart the service:
#mkdir -p /samba/anonymous
#systemctl enable smb.service
#systemctl enable nmb.service
#systemctl restart smb.service
#systemctl restart nmb.service
Add these Iptables rules, so that samba will work perfectly:
#firewall-cmd --permanent --zone=public --add-service=samba
#firewall-cmd --reload
Change permission for samba share:
#chmod -R 0755 anonymous/
#chown -R nobody:nobody anonymous/
Further we need to allow the selinux for the samba configuration as follows:
#chcon -t samba_share_t anonymous/
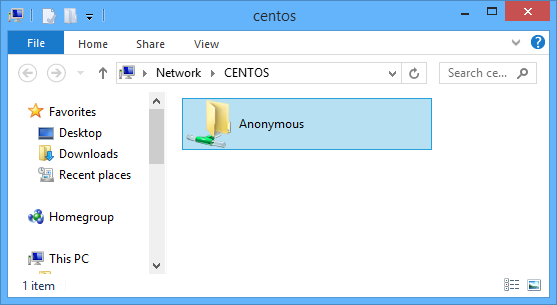
Now you can access the Centos 7.0 sharing in windows as follows, go to the Run prompt and type \centos :

Acesse \\centos
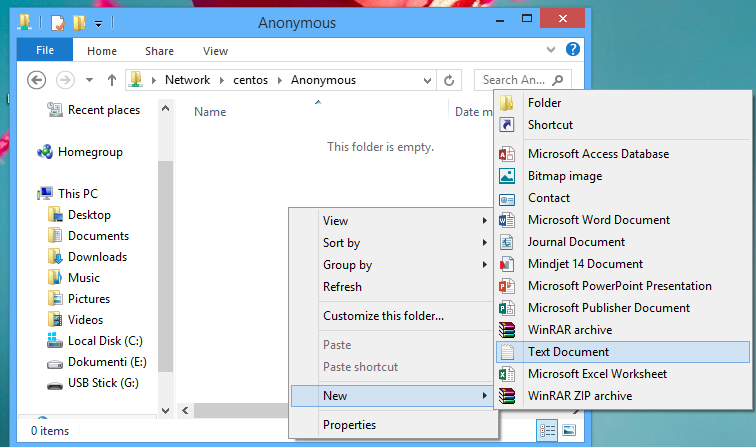
Now anonymous user can browse & create new text documents:
Secured samba server
For this I will create a group smbgrp & user rasho to access the samba server with proper authentication
#useradd rasho
#groupadd smbgrp
#usermod -a -G smbgrp rasho
#smbpasswd -a rasho
[root@localhost]# smbpasswd -a rasho
New SMB password: YOUR SAMBA PASS
Retype new SMB password: REPEAT YOUR SAMBA PASS
Added user rasho.
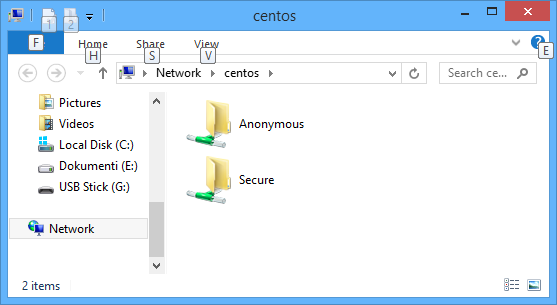
Create a new share, set the permission on the share:
#mkdir /home/secure
#chown -R rasho:smbgrp /home/secure/
#chmod -R 0770 /home/secure/
#chcon -t samba_share_t /home/secure/
Again edit the configuration file as :
#vi /etc/samba/smb.conf
Add the newly created samba share in smb.conf file:
[Secure]
path = /home/secure
valid users = @smbgrp
guest ok = no
writable = yes
browsable = yes

Restart the samba service:
#systemctl restart smb.service
#systemctl restart nmb.service
Now at windows machine check the folder now with the proper credentials
Open samba sharing

Create new text documents:
That is all!