Olá amigos, tudo bem?
Recentemente passamos por uma situação na qual tivemos que envolver tanto a engenharia da Vmware como fabricante de Hardware e engenharia da Microsoft.
Servidores rodando Windows Server 2019 e 2016 entrava em congelamento seguido de tela azul. Depois de quase um mês em trabalho em conjunto com todos os fornecedores chegamos a conclusão que o problema é a soma de varias boas praticas que precisavam ser adotadas no Windows.
Primeiro trabalho com o fabricante de Hardware e Vmware foi descartar qualquer problema vindo do SAN, Storage ou Servidores utilizados, vale apena comentar que o problema acontecia em clusters diferentes com modelos de servidores diferentes. Apos todos os meios físicos validados partimos para validação do SO juntamente com a Microsoft e o fabricante do Hardware, aonde foi encontrado o log do Windows que no momento do congelamento apresentava BugCheck .

Interessante comentar que no Vmware não gerava nenhum log de erro ou problema, a Vmware estava conectada no ambiente e não visualizava problema que poderia causar aquele sintoma.
Nesse momento começamos a identificar que existia updates e ajustes do lado do Vmware quanto da Microsoft como:
• Executar o Windows Update nas VMs e garantir que o kb4550969 foi aplicado.
https://support.microsoft.com/en-us/help/4550969
• Atualizar o VMware Tools para a versão mais recente.
https://docs.vmware.com/en/VMware-Tools/11.0.0/com.vmware.vsphere.vmwaretools.doc/GUID-B632D26F-410A-43C9-9BFD-21EBB21DE397.html
• Verificar as propriedades das VMs e garantir que o VBS (Virtualization-based Security) está ativado.
https://docs.vmware.com/en/VMware-vSphere/6.7/com.vmware.vsphere.security.doc/GUID-84BDD44A-0588-492D-A312-A2648BEBA12C.html
• Configurar as VMs para usar o Paravirtual controller conforme descrito no artigo abaixo:
https://kb.vmware.com/s/article/1010398
• Utilizar adaptador de rede Vxnet3 (mais performático e não é emulado)
https://kb.vmware.com/s/article/1001805?lang=pt_PT
Outro ponto muito importante foi a remoção do Snapshot, mas porque? Muitos clientes pensam que Snapshot é backup, porem ele pode causar mais problema para a vm do que gerar segurança.
Por boa pratica uma maquina de produção ligada pode ter um snap de no máximo 72 horas, e isso não era uma verdade pois tínhamos clientes com snap maior de três meses.
Se o backup é necessário deve ser usado alguma ferramenta especifica como Veeam ou outros players com a finalidade de backup.
Deixo abaixo a KB sobre as melhores praticas que foram comentadas a cima de SnapShot.
https://kb.vmware.com/s/article/1025279?lang=pt_PT
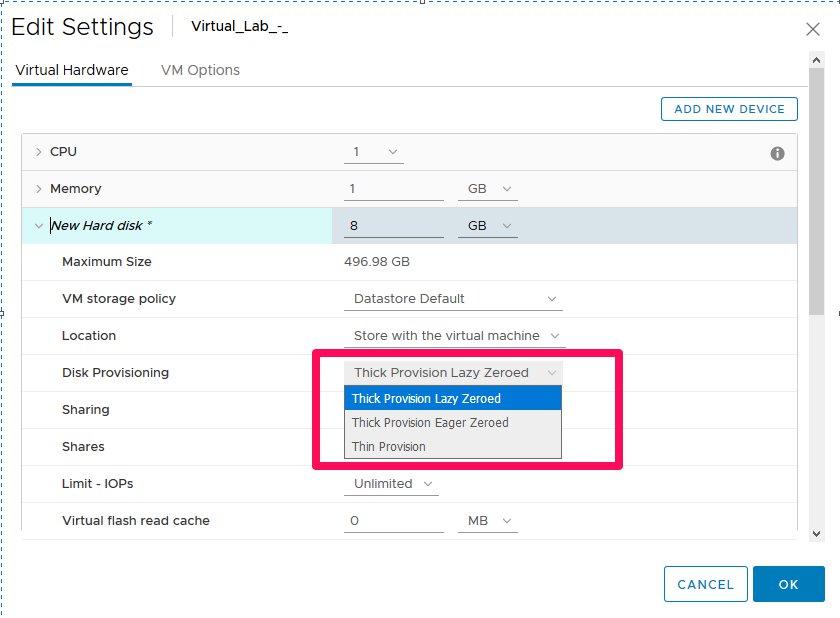
Por entregarmos o Vmware Cloud para os clientes tivemos que adotar o bloqueio do deploy por ISO e adotar o template seguindo as melhores praticas, com isso não tivemos nenhum problema de congelamento que antes era frequente .
Essa documentação do Vmware é muito boa para ajudar a seguir as melhores praticas e performance do ambiente.
Qualquer duvida fico a disposição. Abraços