We can run graphical programs on Linux machines on campus remotely and display them on your desktop computer running Windows. We can do this by using running two applications together on your Windows machine: Xming and PuTTY.
What is Xming?
Xming is a PC X Window Server. This enables programs being run remotely to be displayed on your desktop. Download and run the installation program from: http://sourceforge.net/projects/xming/
1- Navigate to the Files section and download:
*Xming setup from the Xming folder
*The fonts package installer from the Xming-fonts folder
2- By default both programs will be installed into the same location, so don’t the worry about over writing files. We cannot work without both packages.
3- Once installed, running All Programs > Xming > XLaunch is a good idea to see what the configuration looks like. In most cases, the default options should be just fine.
4-Finally run All Programs > Xming > Xming to start the PC X Server. The “X” icon should be visible on the Windows Taskbar, as in the image below. The X Server must be started before setting up a SSH connection to a campus machine.
![]()
What is PuTTY?
PuTTY is a free SSH client. Through PuTTY we connect to a remote machine on the UT Dallas campus. Download the single Windows executable file from: http://www.chiark.greenend.org.uk/~sgtatham/putty/download.html There is no setup required, you can run by simply double clicking putty.exe.
Configuring PuTTY
1-Under Session, enter the hostname you want to connect to: 192.168.0.22 on port 22. Make sure the connection type is ssh.

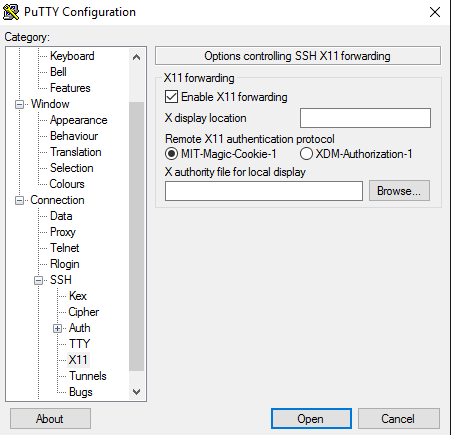
1-Next, scroll to Connection > SSH > X11. Check the box next to Enable X11 Forwarding. The remote authentication should be set to MIT-Magic-Cookie-1
2-Finally go back to Session. You can save your session too, and load it each time you want to connect.
3-Click Open to bring up the terminal and login using your netid/password .
Now with the ready configuration, will connect to the server.
Note: At this point it is important to log in with the User that will run the graphical interface.
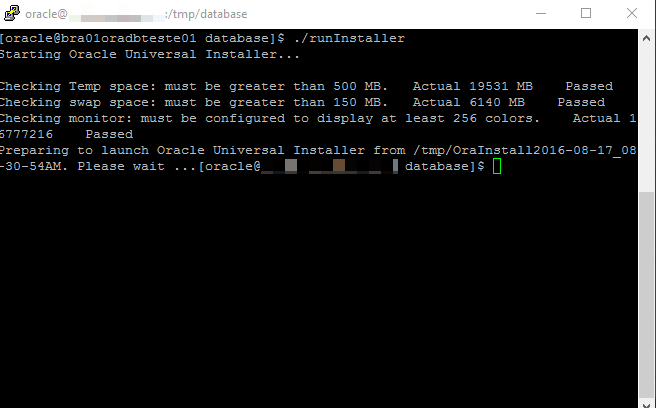
Run the program
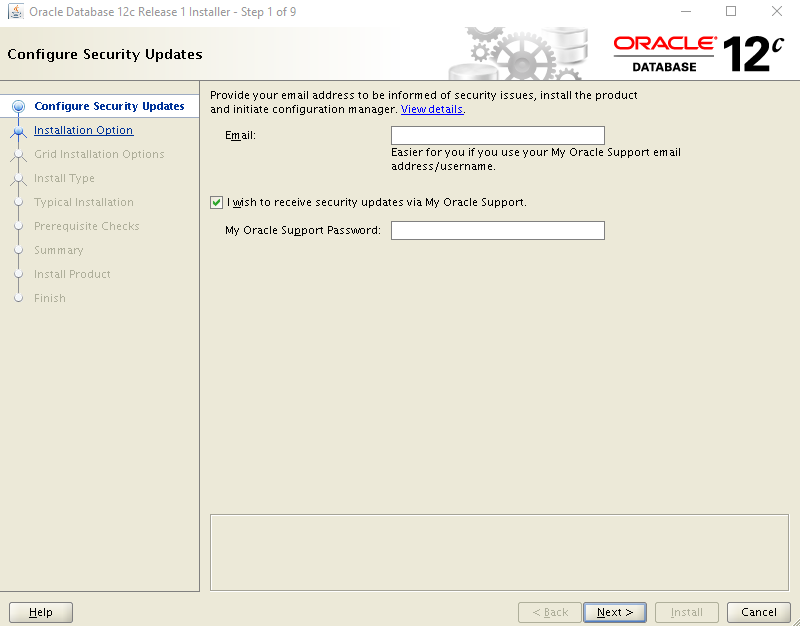
That is all.
Any doubts I am available.
8 Comentários
I must thank you for the efforts you’ve put in penning this
website. I really hope to see the same high-grade blog posts from you in the future
as well. In fact, your creative writing abilities has motivated me to get my own, personal
blog now 😉
Thanks 😉
I just couldn’t go away your web site prior
to suggesting that I really loved the standard information a person supply for your visitors?
Is gonna be back regularly to inspect new posts
Thank you for your suggestions
Please let me know if you’re looking for a article
author for your blog. You have some really good posts and I believe I would be a good asset.
If you ever want to take some of the load off, I’d love to write some material for your blog in exchange for
a link back to mine. Please send me an email if interested.
Kudos!
Hello friend, of course it is always good to have new articles.
Can you check me on Skype? Contact: geraldo.ti
I am in fact thankful to the owner of this site who has
shared this fantastic paragraph at here.
thank you