We can run graphical programs on Linux machines on campus remotely and display them on your desktop computer running Windows. We can do this by using running two applications together on your Windows machine: Xming and PuTTY.
What is Xming?
Xming is a PC X Window Server. This enables programs being run remotely to be displayed on your desktop. Download and run the installation program from: http://sourceforge.net/projects/xming/
1- Navigate to the Files section and download:
*Xming setup from the Xming folder
*The fonts package installer from the Xming-fonts folder
2- By default both programs will be installed into the same location, so don’t the worry about over writing files. We cannot work without both packages.
3- Once installed, running All Programs > Xming > XLaunch is a good idea to see what the configuration looks like. In most cases, the default options should be just fine.
4-Finally run All Programs > Xming > Xming to start the PC X Server. The “X” icon should be visible on the Windows Taskbar, as in the image below. The X Server must be started before setting up a SSH connection to a campus machine.
![]()
What is PuTTY?
PuTTY is a free SSH client. Through PuTTY we connect to a remote machine on the UT Dallas campus. Download the single Windows executable file from: http://www.chiark.greenend.org.uk/~sgtatham/putty/download.html There is no setup required, you can run by simply double clicking putty.exe.
Configuring PuTTY
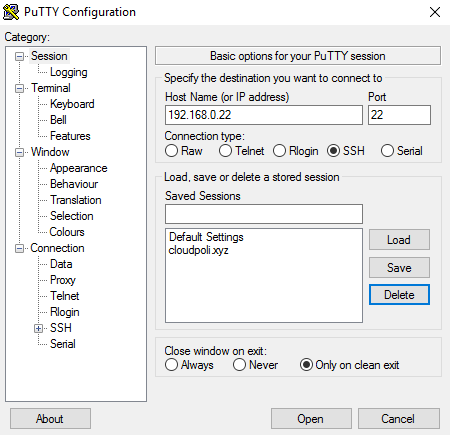
1-Under Session, enter the hostname you want to connect to: 192.168.0.22 on port 22. Make sure the connection type is ssh.

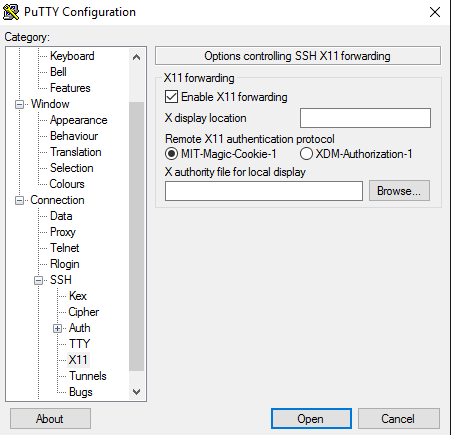
1-Next, scroll to Connection > SSH > X11. Check the box next to Enable X11 Forwarding. The remote authentication should be set to MIT-Magic-Cookie-1
2-Finally go back to Session. You can save your session too, and load it each time you want to connect.
3-Click Open to bring up the terminal and login using your netid/password .

Now with the ready configuration, will connect to the server.
Note: At this point it is important to log in with the User that will run the graphical interface.

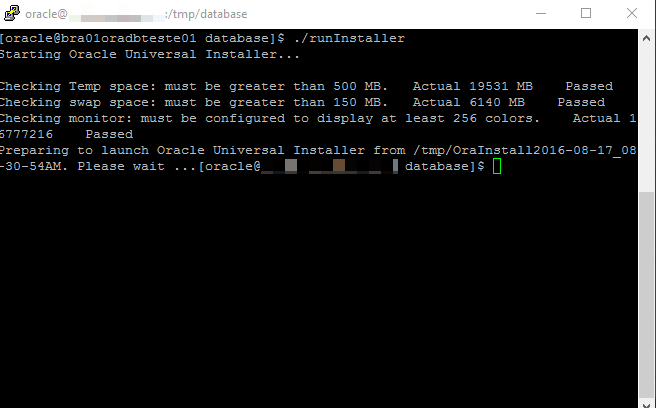
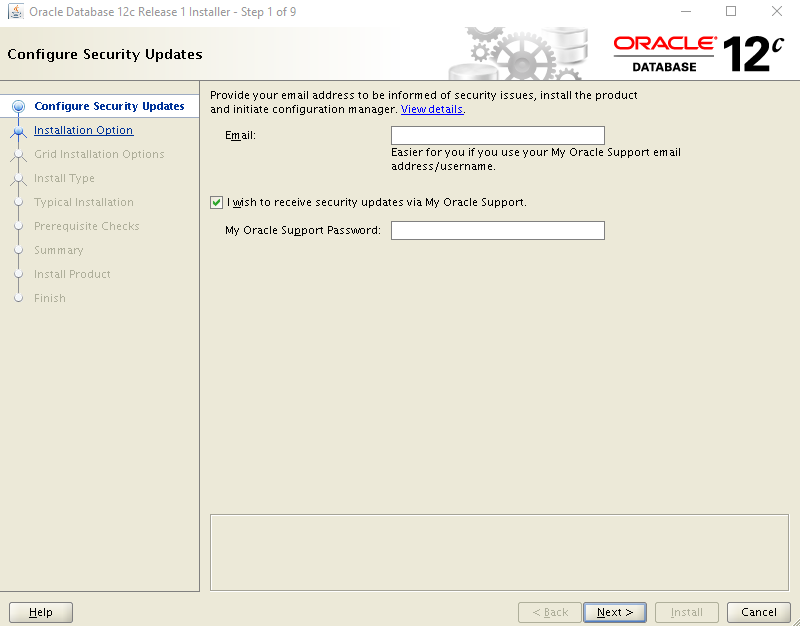
Run the program

That is all.
Any doubts I am available.