How To Install Docker on Centos 7 and Red Hat 7

Hello friends, I’m starting some posts referring to a Docker.
During the next months, we will make an update more frequent, all of us who have a suggestion please send an email to: geraldo@techpoli.info.

Introduction:

Docker is a software technology providing containers, promoted by the company Docker, Inc. Docker provides an additional layer of abstraction and automation of operating-system-level virtualization on Windows and Linux. Docker uses the resource isolation features of the Linux kernel such as cgroups and kernel namespaces, and a union-capable file system such as OverlayFS and others to allow independent “containers” to run within a single Linux instance, avoiding the overhead of starting and maintaining virtual machines.

The Linux kernel’s support for namespaces mostly isolates an application’s view of the operating environment, including process trees, network, user IDs and mounted file systems, while the kernel’s cgroups provide resource limiting, including the CPU, memory, block I/O, and network. Since version 0.9, Docker includes the libcontainer library as its own way to directly use virtualization facilities provided by the Linux kernel, in addition to using abstracted virtualization interfaces via libvirt, LXC (Linux Containers) and systemd-nspawn.

Step 1: Installation of Docker

As a matter of best practice we’ll update our packages:

yum -y update

Now run this command. It will add the official Docker repository, download the latest version of Docker and install it:

curl -fsSL https://get.docker.com/ | sh

Step 2: Start the docker and configure to start with the operating system.

Set the Docker service to start at boot:

systemctl enable docker

Then start the Docker service:

systemctl start docker

And verify your work by checking the status of Docker:

systemctl status docker

Step 3: Download Container

Download the centos Docker image:

Note you can choose any system like Ubuntu or Debian.

docker pull centos

Step 4: Run Container

As an example, let’s run a container using the latest image of CentOS. The combination of the -i and -t switches gives you interactive shell access into the container:

docker run -i -t centos /bin/bash

You are now using a docking dock inside a docker centos.

To disconnect or detach from the shell without exiting, use a string of Ctrl + Ctrl-p + Ctrl-q.

There are many community containers already available that can be found through a survey. On the command below, I look for a Ubuntu keyword:

docker search ubuntu:17.04

Friends, that’s all.
We will continue with more advanced articles on docker.

Continue Reading

How to Install and Configure VMware vSphere Hypervisor 6.0 (ESXi 6.0)

1. Register with VMware.com and Download VMware vSphere Hypervisor 6.0

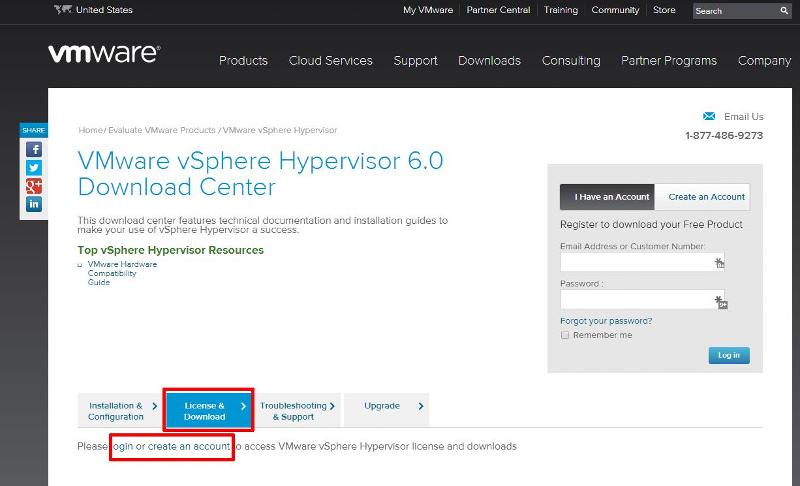
Open the following link in your web browser https://my.vmware.com/web/vmware/evalcenter?p=free-esxi6

Click the License and Download Tab
VMware60-DownloadCenter1

Click Create an Account, to Create an Account and Login to the VMware Download Center. VMware will email you an Activation link which needs to be opened to create the account.

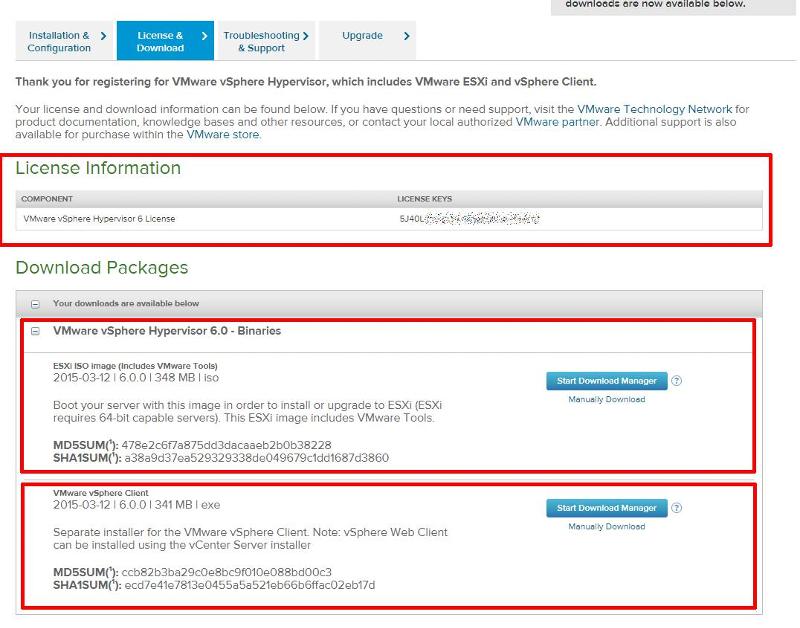
The following page will be displayed when you have successfully logged into the VMware Download Center.
VMware60-DownloadCenter2

Pay special attention to the FREE License information which is displayed, and record this License Number, this will be required in a later article.

Click the download link for VMware vSphere Hypervisor 6.0 – Binaries ESXi ISO Image to download the software required to install ESXi 6.0 and also download the VMware vSphere Client 6.0. The VMware vSphere Client 6.0 software is the client software that allows us to connect and manage the ESXi 6.0 server, this will be required in a later article.

Either use the Download Manager or Manually Download button (which uses your web browser). The CD ISO is only 301MB so should not take too long to download. We have a very slow internet connection, at approx 350 kB/sec, and it takes us approximately 10 minutes to download.

2. Installing VMware vSphere Hypervisor 6.0 (ESXi 6.0)

Write (Burn) the VMware-VMvisor-Installer-6.0.0-2159203.x86_64.iso downloaded in Step 1, to a blank CDROM, using your favourite CD writing software. We use ISO Recorder (http://alexfeinman.com/isorecorder.htm). If you are using remote server utilities, e.g. HP iLo or Dell iDRAC,. you can attach the virtual CDROM drive in the server to the VMware-VMvisor-Installer-6.0.0-2159203.x86_64.iso ISO, so there is no requirement to write a CDROM.

This is a step which is often missed, ensure the BIOS BOOT order is set to BOOT from the CDROM Device or ATAPI device in the server, otherwise the computer will not BOOT from the CDROM.

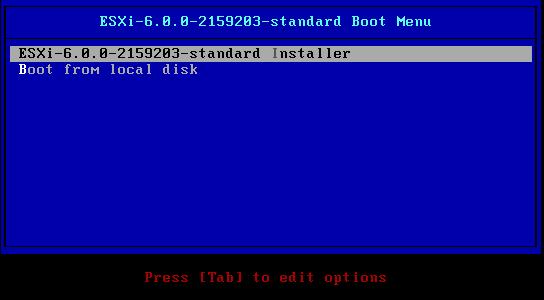
Power on the Computer, the computer will BOOT from the CDROM, and the following BOOT screen will be displayed
ESXi6.0-CDROM-BOOT

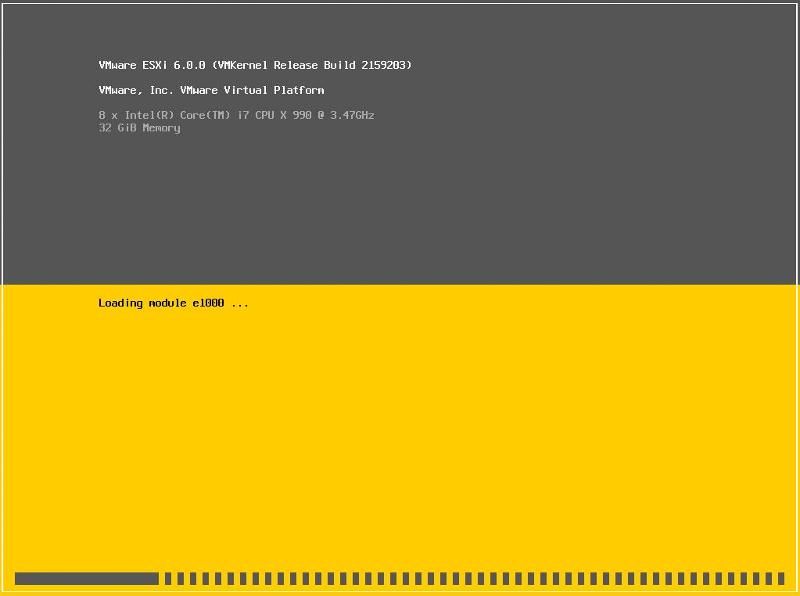
The default option is to BOOT ESXi-6.0.0-2159203-standard Installer after 10 seconds, hit any key will pause the BOOT process.
ESXi6.0-CDROM-BOOT1

At the Welcome to the VMware ESXi 6.0.0 Installation screen Hit Enter to Continue the installation.

3

Press F11 (Function Key 11) to Accept the VMware End User License Agreement (EULA)
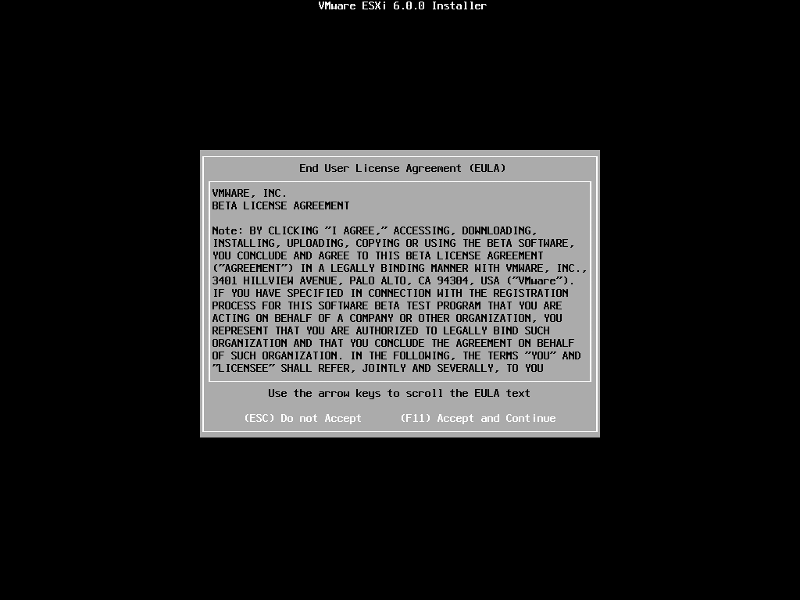
2015-01-03-13-39-16-Greenshot

The ESXi installer will scan the computer storage controller for available devices to install ESXi.

5

ESXi can be installed on a USB flash drive, SD card attached to the computer, local SATA, local RAID Array, or Fibre Channel or iSCSI LUN. All these are supported options. As the footprint for ESXi is very small only 1GB is required for the ESXi OS installation.

We have written an EE Article here on How to Backup an ESXi installation on an USB Flash Drive or SD card, for security or redundancy. After you have completed the ESXi 5.1 installation, shutdown the server, remove the USB flash drive or SD card, and duplicate it using our EE Article.

When prompted select a disk to install ESXi on, in the following example, we have two disks connected to this computer, a single 1GB disk, and a 120GB disk. We are going to use the small disk for the OS. (this simulates the USB flash drive!). The larger 120GB disk will be used later for the storage of virtual machines.

6

When prompted, select the keyboard layout and hit Enter to continue. The default keyboard layout is US Default.

7

When prompted enter a root password, confirm the password and hit Enter to continue

8

The following will be displayed

9

When prompted Confirm the Installation on the selected disk and press F11 (Install)
– Function Key 11
All data will be erase, as the disk will be repartitioned.

11

The Progress Bar will confirm installation progress.

22

33

The installation only takes approximately 5-10 minutes, depending upon speed of storage. When the installation has completed the following screen will be displayed.

44

Remove the CDROM installation disk before rebooting. Hit Enter to Reboot. After hitting Enter the follow screen will be displayed and the computer will reboot.

55

ESXi 6.0 will operate in evaluation mode for 60 days. This is the same mode as a FULLY LICENSED ESXi 6.0 server. If you wish to evaluate all the bells and whistles that ESXi 6.0 has to offer, do not register your FREE license. for 60 days, this will allow you to evaluate ESXi 6.0 server fully. On day 59/60, Apply your FREE license to continue using the product, or you will not be able to power on any virtual machines.

3. Configuring VMware vSphere Hypervisor 6.0 (ESXi 6.0)
The following screen is displayed when VMware ESXi 6.0 first boots1

2

3

The server is fully booted when it displays the following screen

4

The default server configuration is to use DHCP, if you do not have a DHCP server issuing IP Addresses on your network you will need to assign an IP Address. We recommend you use a static IP Address for your ESXi Host Server.

Press F2 to Customize System, you will be prompted to enter the root username and password.

5

Select Configure Management Network to change Network Parameters.
Select IPv4 Configuration

6

Set the Static IPv4 address and network configuration, Subnet Mask and Default Gateway, it’s important to set the correct Default Gateway, as this will be used later. Hit Enter to confirm and save the configuration.

7

Select DNS Configuration, enter the correct DNS information for your network, and enter a hostname for your server. Hit Enter to save the configuration.

8

Select Custom DNS Suffixes
Enter your DNS suffix (the domain name for your network). Make sure you have created a DNS A Record in your DNS, so that this server can be resolved correctly through forward and reverse lookups.

Hit Enter to save your configuration.

Press Escape, the following screen will appear, select Y(es) to apply changes.

9

Press Escape to Logout and return to the console screen.

You will notice on the console screen, the server now has a hostname configured, and correct static IP Address.

10

Congratulations you have successfully installed and configured VMware vSphere Hypervisor 6.0.

In the next article in the series, we will connect and continue to configure the VMware vSphere Hypervisor 6.0.

Continue Reading

Installing VMware Tools in a Linux virtual machine on Centos 7 and Red Hat 7

To install VMware Tools in a Linux guest operating system using Compiler:

1-Ensure that your Linux virtual machine is powered on.

2- If you are running a GUI interface, open a command shell.

Note: Log in as a root user, or use the sudo command to complete each of these steps.

3-Click VM in the virtual machine menu, then click Guest > Install/Upgrade VMware Tool

4-Click OK.

Note: In some cases, verify that the CDROM device is Connected from within the Edit Settings option of the virtual machine.

5-  To create a mount point, run:

mkdir /mnt/cdrom

6- To mount the CDROM, run:

mount /dev/cdrom /mnt/cdrom

7- To copy the Compiler gzip tar file to a temporary local directory, run:

cp /mnt/cdrom/VMwareTools-version.tar.gz /tmp/

Where version is the VMware Tools package version.

8-  To determine the version of VMware tools, run:

ls /mnt/cdrom

You see output similar to:

# VMwareTools-5.0.0-12124.tar.gz

9- To change to the tmp directory and extract the contents of the tar file into a new directory called vmware-tools-distrib, run:

cd /tmp
tar -zxvf VMwareTools-version.tar.gz

10- To change directory to vmware-tools-distrib and run the vmware-install.pl PERL script to install VMware Tools, run:

cd vmware-tools-distrib
./vmware-install.pl

Notes:
Complete the screen prompts to install the VMware Tools. Options in square brackets are default choices and can be selected by pressing Enter.
To compile VMware Tools successfully, you need gcc Compiler and Linux Kernel sources provided by your Linux distribution. Consult your Linux distribution documentation for details on methods to install these packages.
It is normal for the console screen to go blank for a short time during the installation when the display size changes.
Some warnings or errors are normal, like when a files does not exist.
Depending on the Linux distribution, your network service might restart after installation. VMware recommends that you invoke this command from the console and not remotely.

11- If you are running a GUI interface, restart your X Window session for any mouse or graphics changes to take effect.

12-  To start VMware Tools running in the background during an X Window session, run:

/usr/bin/vmware-toolbox &

13- Depending on your environment, you may need to unmount the CD-ROM. To unmount the CD-ROM, run:

umount /mnt/cdrom

14- Depending on your environment, you may need to manually end the VMware Tools installation. To end the VMware Tools install, click VM in the virtual machine menu, then click Guest > End VMware Tools Install.

15-To remove VMware Tools installation packages, run:

cd
rm /tmp/VMwareTools-version.tar.gz
rm -rf /tmp/vmware-tools-distrib

That is all

Continue Reading

How to Block Ping ICMP Responses in Linux System

Blocking ping responses from system can prevent system from hackers to ICMP flood dos attacks. So it can be a best practice for system security but most of online monitoring systems uses ping requests for monitoring system.

Disable Ping using iptables

You can simply block icmp responses directly from firewall in any Linux systems.

# iptables -A INPUT -p icmp --icmp-type echo-request -j DROP

Block Ping with Kernel Parameter

We can also block ping responses from system by directly updating kernel parameters. In this we can block ping responses temporarily or permanently as below.

Block Ping Temporarily

You can block temporarily block ping responses temporarily using following command

# echo "1" > /proc/sys/net/ipv4/icmp_echo_ignore_all

Block Ping Permanently
In place of blocking ping temporarily, You can block it permanently by adding following parameter in /etc/sysctl.conf configuration file.

net.ipv4.icmp_echo_ignore_all = 1

Now execute following command to apply settings immediately without rebooting system.

# sysctl -p
Continue Reading

Linux and Unix nohup command

About nohup

When using the command shell, prefixing a command with nohup prevents the command from being aborted if you log out or exit the shell.
The name nohup stands for “no hangup.” The hangup (HUP) signal, which is normally sent to a process to inform it that the user has logged off (or “hung up”), is intercepted by nohup, allowing the process to continue running.


Nohup syntax

nohup COMMAND [ARG]...
nohup OPTION...

Options

--help display a help message and exit.
--version output version information and exit.

If standard input is a terminal, nohup redirects it from /dev/null. If standard output is a terminal, append output to “nohup.out” if possible, “$HOME/nohup.out” otherwise. If standard error is a terminal, redirect it to standard output. To save output to file FILE, use “nohup COMMAND > FILE”.

Nohup examples

nohup find -size +100k > log.txt &
Run the find command, instructing it to search for any file bigger then 100 kilobytes. find will continue to search even if the user logs out, and write its results to the file log.txt.
The “&” symbol at the end of the command runs find in the background, returning you to the command prompt while it is running. It is normal to use nohup in conjunction with & if you want to continue running other commands.

Related commands

nice — Invoke a command with an altered scheduling priority.

Continue Reading