Windows server cannot join an Active Directory domain due to duplicate SID’s

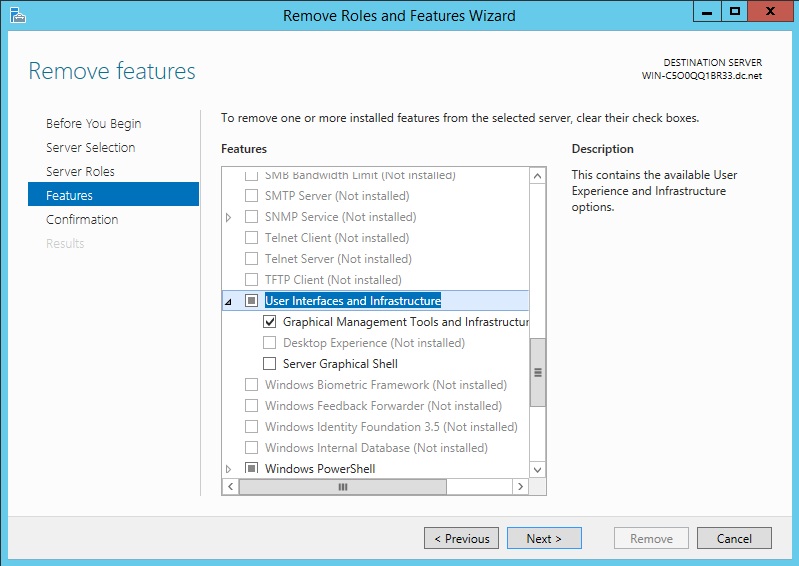
Issue:Windows displays the following error message:

The domain join cannot be completed because the SID of the domain you attempted to join was identical to the SID of this machine. This is a symptom of an improperly cloned operating system installation. Run sysprep on this machine in order to generate a new machine SID.

Solution:

Run sysprep.exe in a Command Prompt window to generate a new SID.

1. Type c:\windows\system32\sysprep\sysprep.exe /oobe /generalize /reboot and press Enter in the Command Prompt window to change the SID and run OOBE.

Run sysprep.exe in the Windows Graphical User Interface (GUI) to generate a new SID.

1. Press Windows Logo+R, type sysprep.exe and press Enter to run sysprep.exe.

2. Select Enter System Out-of-Box Experience (OOBE) in System Cleanup Action, check Generalize and select Reboot in Shutdown Options to change the SID and run OOBE. Click OK to complete the process.

This information applies to Windows Server 2012 and Windows Server 2012 R2.

Continue Reading

How to changing a forgotten password on ESXi

ESXi 5.x and ESXi 6.x

Reinstalling the ESXi host is the only supported way to reset a password on ESXi. Any other method can lead to a host failure or an unsupported configuration due to the complex ESXi architecture. An ESXi does not have a service console. This locking aims to improve the security of the host ski against security breaches and increase availability.

Very Important at the time of installation of ESXI select the installation preserving the datastore.

ESXi 3.x and 4.x
Note: This section does not apply to ESXi.

To change the password for the root user on an ESX 3.x or ESX 4.x host:

Reboot the ESX host.
When the GRUB screen appears, press the space bar to stop the server from automatically booting into VMware ESX.
Use the arrow keys to select Service Console only (troubleshooting mode).
Press the akey to modify the kernel arguments (boot options).
On the line presented, type a space followed by the word single.
Press Enter. The server continues to boot into single-user mode.
When presented with a bash prompt, such as sh-2.05b#, run the passwd command.
Follow the prompts to set a new root user password..
When the password is changed successfully, reboot the host using the reboot command and allow the ESX host to boot normally.

ESXi Server 2.x
Note: This section does not apply to ESXi.

To change the password for the root user on an ESX 2.x host, you must reboot into single-user mode. To do this, perform these steps:

Reboot the ESX host.
When the LILO screen appears, press the space bar to stop the server from automatically booting into VMware ESX.
At the LILO prompt select linux, adding the -s to the end of the line. For example: linux -s.
Press Enter. The system begins to boot. The server continues to boot into single-user mode.
When presented with a bash prompt, such as sh-2.05b#, run the passwd command..
Follow the prompts to set a new root user password.
When the password is changed successfully, reboot the host using the reboot command and allow the ESX host to boot normally.

When the system has finished booting, you can log in as the root user using the new password.

Additional Information in the VMware Knowledge Base Article.

Continue Reading

How to Stop and Start Firewalld on Centos 7 and Red Hat 7

Default installations of the CentOS 7 Linux operating system have the firewalld firewall installed and enabled by default as a security measure, but how can we disable it?

Disable Firewalld:
To disable firewalld, run the command as root:

systemctl disable firewalld

Stop Firewalld
To stop firewalld:

systemctl stop firewalld

Check the Status of Firewalld
And finally, to check the status of firewall:

systemctl status firewalld

Enable Firewalld
To enable firewalld, run the following command as root:

systemctl enable firewalld

Start Firewalld
To start firewalld, run the following command as root:

systemctl start firewalld

Check the Status of Firewalld

To check the status of firewalld, run the following command as root:

systemctl status firewalld

Continue Reading

Arduino Uno R3 Temperature Sensor

Hellow Friends, in the last few monthly a demand has arisen to colect a DataCenter’s temperature and store the information in a text file.
Doing a brief research I couldn’t find a solution to attend the company’s needs, so I’ve decided to develop my own measurement temperature device.

Preview:

Materials:

1-Arduino Uno R3
1-Breadboard 400 Holes
1-Potentiometer 10k
1-Sensor temperature and humidity dht11
1-Display 16×2

Arduino Code:

the Arduino’s code is sending information to a COM port. As I’m not using an ethernet interface it needs some interface to colect the temperature and humidity. To do so I’ve developed the java program as follow to colect the information through the COM port.

Java Code

The design is pretty simple.
This project is intended to be used for people interested on monitor the Server’s humidity and temperature.
The data could be imported whether to nagios or splunk to analyze and monitoring.

That’s all.

Continue Reading

How To Install Docker on Centos 7 and Red Hat 7

Hello friends, I’m starting some posts referring to a Docker.
During the next months, we will make an update more frequent, all of us who have a suggestion please send an email to: geraldo@techpoli.info.

Introduction:

Docker is a software technology providing containers, promoted by the company Docker, Inc. Docker provides an additional layer of abstraction and automation of operating-system-level virtualization on Windows and Linux. Docker uses the resource isolation features of the Linux kernel such as cgroups and kernel namespaces, and a union-capable file system such as OverlayFS and others to allow independent “containers” to run within a single Linux instance, avoiding the overhead of starting and maintaining virtual machines.

The Linux kernel’s support for namespaces mostly isolates an application’s view of the operating environment, including process trees, network, user IDs and mounted file systems, while the kernel’s cgroups provide resource limiting, including the CPU, memory, block I/O, and network. Since version 0.9, Docker includes the libcontainer library as its own way to directly use virtualization facilities provided by the Linux kernel, in addition to using abstracted virtualization interfaces via libvirt, LXC (Linux Containers) and systemd-nspawn.

Step 1: Installation of Docker

As a matter of best practice we’ll update our packages:

yum -y update

Now run this command. It will add the official Docker repository, download the latest version of Docker and install it:

curl -fsSL https://get.docker.com/ | sh

Step 2: Start the docker and configure to start with the operating system.

Set the Docker service to start at boot:

systemctl enable docker

Then start the Docker service:

systemctl start docker

And verify your work by checking the status of Docker:

systemctl status docker

Step 3: Download Container

Download the centos Docker image:

Note you can choose any system like Ubuntu or Debian.

docker pull centos

Step 4: Run Container

As an example, let’s run a container using the latest image of CentOS. The combination of the -i and -t switches gives you interactive shell access into the container:

docker run -i -t centos /bin/bash

You are now using a docking dock inside a docker centos.

To disconnect or detach from the shell without exiting, use a string of Ctrl + Ctrl-p + Ctrl-q.

There are many community containers already available that can be found through a survey. On the command below, I look for a Ubuntu keyword:

docker search ubuntu:17.04

Friends, that’s all.
We will continue with more advanced articles on docker.

Continue Reading